There’s something truly magical about transforming a handful of humble almonds into a silky, creamy milk that’s as fresh as the morning dew. Homemade almond milk is not just a dairy alternative-it’s an invitation to slow down,savor simplicity,and nourish your body with the purest ingredients. In this guide, we’ll take you on a flavorful journey through the art of crafting your own almond milk: from selecting the best nuts to achieving that perfect creamy texture, and even exploring delicious twists to elevate your homemade brew. Say goodbye to additives and hello to freshness-welcome to your new favourite kitchen ritual.
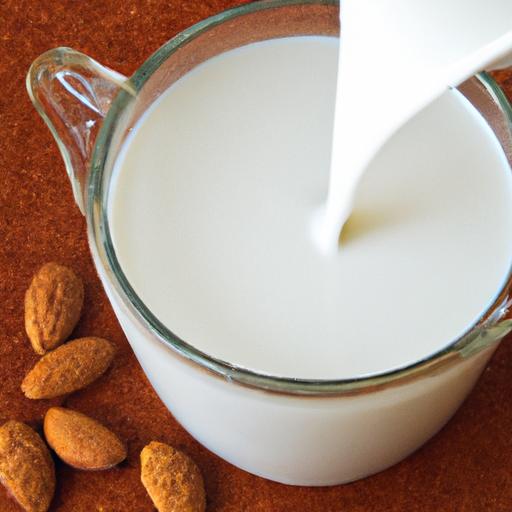
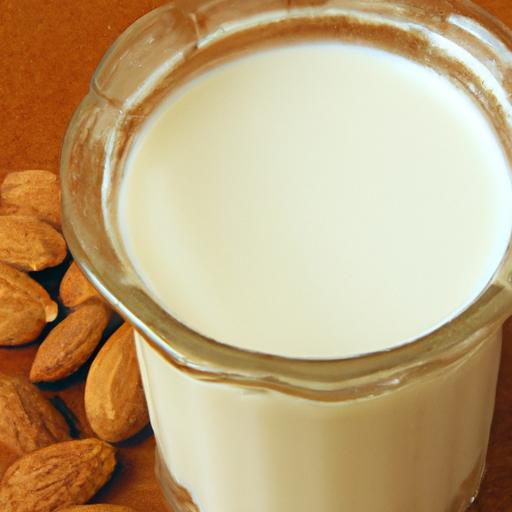
Creamy almond milk, cherished for its subtle nutty sweetness and velvety texture, elevates every kitchen creation it touches. Crafting this fresh delight at home starts with selecting the perfect almonds-raw,organic,and plump nuts bring out the richest flavors and smoothest consistency. This guide unveils the soaking secrets and blending techniques that transform simple almonds into a luscious dairy-free milk, complete with natural sweeteners and flavor enhancements for a personalized taste experience. With expert storage tips and creative culinary uses, your homemade almond milk journey will be as inspiring as it is delicious.
Prep and Cook Time
- Preparation: 10 minutes + soaking time (8-12 hours)
- Blending: 2-3 minutes
- Total Time: Approximately 8-12 hours (mostly hands-off)
Yield
Approximately 4 cups (1 quart) of creamy homemade almond milk
Difficulty Level
Easy – perfect for beginners and seasoned home chefs alike
Ingredients
- 1 cup raw, organic almonds (preferably unblanched for maximum flavor)
- 4 cups filtered water (for blending and soaking)
- 1-2 tablespoons natural sweetener (such as maple syrup, agave nectar, or raw honey - optional)
- 1 teaspoon pure vanilla extract (optional, for subtle aromatic depth)
- pinch of sea salt (to enhance flavor)
Instructions
- Rinse and soak the almonds: Rinse the almonds thoroughly under cool water, then place them in a large bowl and cover with 4 cups of filtered water. Soak for 8 to 12 hours or overnight. This softens the nuts, making them easier to blend and unlocking enzymes for better digestibility.
- Drain and rinse again: After soaking, drain the almonds and rinse under cool water to remove any residual enzymes and bitterness. Fresh water here ensures clearness and purity in the milk.
- Blend to creamy perfection: Transfer the soaked almonds to a high-speed blender. Add 4 cups of filtered water and blend on high for 2 to 3 minutes.Blend until the mixture looks smooth and creamy with no visible nut bits.
- Strain the milk: Using a nut milk bag, fine mesh strainer, or cheesecloth over a large bowl, strain the almond mixture. Gently squeeze or press to extract every drop of silky milk while leaving the pulp behind.
- Add sweeteners and flavor: Pour the strained almond milk back into the blender. Add your chosen natural sweetener, vanilla extract, and a pinch of sea salt. Blend again briefly, about 20 seconds, to mix evenly.
- Chill and enjoy: Pour the creamy almond milk into a clean glass jar or bottle. refrigerate for at least 1 hour to develop its fresh flavor and chill thoroughly before serving. Shake well before each use.
Tips for Success: Maximizing Freshness and Flavor
- Choose quality almonds: Fresh, organic, raw almonds deliver the creamiest texture and best flavor. Avoid roasted or salted almonds as thay alter the milk’s natural taste.
- Soaking time matters: Don’t rush soaking-it’s crucial for softness and achieving that signature creamy consistency.
- Blending power: A high-speed blender ensures a smooth finish without graininess. If your blender is less powerful, blend longer or in batches.
- Sweetener selection: Maple syrup or agave nectar complement the nuttiness beautifully, offering a mild and natural sweetness. Adjust to taste for your perfect balance.
- Keep it fresh: Homemade almond milk lasts about 3-4 days refrigerated. Always shake before using, as natural separation occurs.
- Save the pulp: Don’t discard the leftover almond pulp! It’s perfect for adding to smoothies, baked goods, or homemade granola for extra fiber and flavor.
Serving Suggestions: Elevate Every Sip
Enjoy your homemade almond milk chilled as a refreshing drink or use it to enhance your breakfasts and desserts:
- Pour over steel-cut oats or overnight chia pudding and garnish with fresh berries and a sprinkle of cinnamon.
- Blend into your morning coffee or matcha latte for a luxurious, creamy finish.
- Use as a base for smoothies-combine with banana, spinach, and a drizzle of honey for a nutritious boost.
- Create a dairy-free ice cream by freezing almond milk blended with coconut cream and vanilla.
- Drizzle over pancakes or waffles instead of syrup for a subtly nutty twist.
| Nutrient | Per 1 cup (240ml) |
|---|---|
| Calories | 60 |
| Protein | 2 g |
| Carbohydrates | 1.5 g |
| Fat | 5 g |

Discover more plant-based dairy alternatives and kitchen tips in our homemade cashew milk guide. For in-depth nutritional science on nuts and their benefits, visit Healthline’s expert article.
Q&A
Q&A: Creamy & Fresh - Your Guide to Homemade almond Milk
Q1: Why make almond milk at home instead of buying it from the store?
A1: Homemade almond milk offers unparalleled freshness and creaminess you can’t always find in store-bought versions. Plus, making it yourself lets you control the ingredients-no additives, preservatives, or hidden sugars-just pure, wholesome almonds and water. It’s also eco-friendly, reducing packaging waste and allowing you to reuse almond pulp in other delicious recipes.
Q2: What’s the secret to getting almond milk extra creamy?
A2: The magic lies in soaking your almonds long enough-typically 8 to 12 hours-to soften them up,which makes blending much easier. Use a high-speed blender and blend for at least 2 minutes to fully break down the almonds. Straining through a fine nut milk bag or cheesecloth ensures a silky smooth texture. For even creamier milk,try adding a pinch of vanilla,a date,or a touch of coconut water.
Q3: Is almond pulp leftover from making milk still useful?
A3: Absolutely! Don’t toss that almond pulp-it’s edible,fiber-rich,and perfect for baking cookies,muffins,or energy balls. You can also dry it out and turn it into almond flour. Getting creative with the pulp is a splendid way to reduce waste and extend the deliciousness beyond the milk alone.
Q4: Can I customize the flavor of my homemade almond milk?
A4: Yes! Almond milk is a blank canvas waiting for your signature twist. Experiment with natural sweeteners such as maple syrup, honey (for non-vegan versions), or medjool dates. Spice it up with cinnamon, a dash of sea salt, or a splash of pure vanilla extract. For a tropical vibe, blend in some shredded coconut or a hint of cardamom.
Q5: How long does homemade almond milk last?
A5: When stored in a sealed container in the refrigerator, homemade almond milk typically stays fresh for 3 to 5 days. Always give it a sniff and a little stir before use-natural separation is normal, but sour smells or off flavors mean it’s time to refresh your batch.
Q6: Is it necessary to soak almonds before making milk?
A6: Soaking isn’t absolutely required but highly recommended. It softens the almonds, making them easier to blend and increasing nutrient availability. Soaking also helps release enzymes that can improve digestibility. If short on time, a quick soak of 2 hours will help, but for the creamiest milk, aim for a longer soak.
Q7: Can I make almond milk without straining?
A7: You can blend and skip straining, but the texture will be much thicker and grainier-more like almond smoothie than milk. Straining filters out the gritty bits, resulting in that classic smooth almond milk texture many people love. For a quick drink, unstrained can work, but for coffee, cereal, or recipes, straining is frequently enough preferred.
Q8: What equipment do I need to make almond milk at home?
A8: The essentials are simple: a good blender,a nut milk bag or cheesecloth for straining,and a bowl or pitcher to collect the milk. Optional but helpful tools include a fine mesh sieve and a funnel for bottling. With these basics, you’re all set for a fresh batch of homemade almond milk anytime.
Q9: Is homemade almond milk vegan and allergy-friendly?
A9: Homemade almond milk is naturally vegan, gluten-free, and dairy-free-making it a great option for many dietary restrictions. However, since almonds are tree nuts, it’s important to avoid almond milk if you have nut allergies, and always inform guests if using it in recipes.
Q10: How can I use leftover almond milk beyond drinking it plain?
A10: Homemade almond milk is wonderfully versatile! Use it in smoothies, coffee, or tea as a creamy alternative. It works beautifully in oatmeal, baked goods, soups, and sauces. You can even freeze it into ice cubes to chill beverages without watering them down. The fresh, nutty flavor enhances both sweet and savory dishes alike.
Ready to blend your own batch? With these tips, your homemade almond milk journey will be creamy, fresh, and delicious every time!
The Conclusion
As you embark on your homemade almond milk journey, remember that the magic lies not only in the creamy, fresh taste but in the simple joy of crafting something wholesome with your own hands. From soaking those humble almonds to savoring the final splash in your morning coffee, each step connects you to nature’s bounty and mindful living. So, next time you reach for a carton, consider blending your own-because homemade almond milk isn’t just a beverage; it’s a delicious invitation to nurture your body and creativity alike. Cheers to creamy,fresh,and beautifully homemade!